Extracting Tiles from PMTiles
There are a couple ways to extract map tiles from the various archives - the most popular being MBTiles and PMTiles these days. The best way, though, is using tile-join from fel...
There are a couple ways to extract map tiles from the various archives - the most popular being MBTiles and PMTiles these days. The best way, though, is using tile-join from fel...
It's that time of year again to reflect and think about what's coming up in the future. This year was an interesting year, both personally and professionally. Personal We're app...
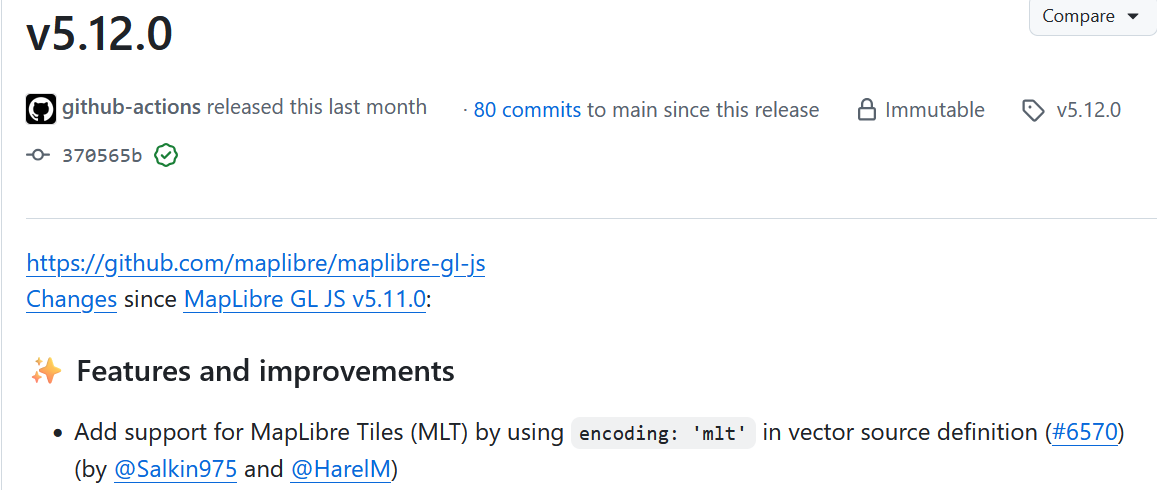
日本語版はこちらです With the release of MapLibre GL JS v5.12.0, MapLibre Tiles (MLT) are now generally accessible to the normal user in a web browser! This post gives a quick introductio...
Until a few months ago, I never really was interested in my age, or the age of people around me. When someone asked me my age, I would have to pause and think about what year it...
日本語版はこちらです Yesterday was my last day at Geolonia. I had been working at Geolonia since the beginning of 2021, making it just over 3 years. During my time there, I worked on many...
I live in a small town that occasionally broadcasts announcements over the radio. For the past few years, I've been building a small Raspberry Pi appliance to transcribe these b...
Happy New Year! For the past few years, I've been using the year-end break to reflect on the past year and set a theme for the next. Last year, I was mainly focused on doing wor...
This year, I really wanted to work on my output, and I think I'm doing pretty well. Here are some things that I've been publishing: Regular monthly blog posts on yakushima.blog...

This year was an eventful year. The biggest event was by far moving from Tokyo to Yakushima, but there were a lot of other events that happened this year. We made the move at th...
I often get asked why I prefer Terraform over CloudFormation. I just ran into a nitpick of CloudFormation and decided to write this post before I forget about it. So, I'm curren...
I currently work at a Japanese mapping startup called Geolonia. We specialize in customizing and displaying geospatial data, and a big part of this is making vector tiles. There...
With the release of the Mac Studio recently -- something that, for quite a long time, I thought I had been waiting for -- I started thinking about what the ideal desktop environ...
I previously wrote about something I wanted to do with DynamoDB and geospatial data, and got a lot of responses on Twitter. In the end, I think I'm going to go with a hybrid app...
Recently, I've been interested in how to serve and work with geographic data with the least amount of "work" possible. Everything here can be done pretty easily with PostGIS and...
Just some stuff I've picked up while working with DynamoDB Global Tables. This was my first time using it; I used it to move a few tables from one region to another without down...
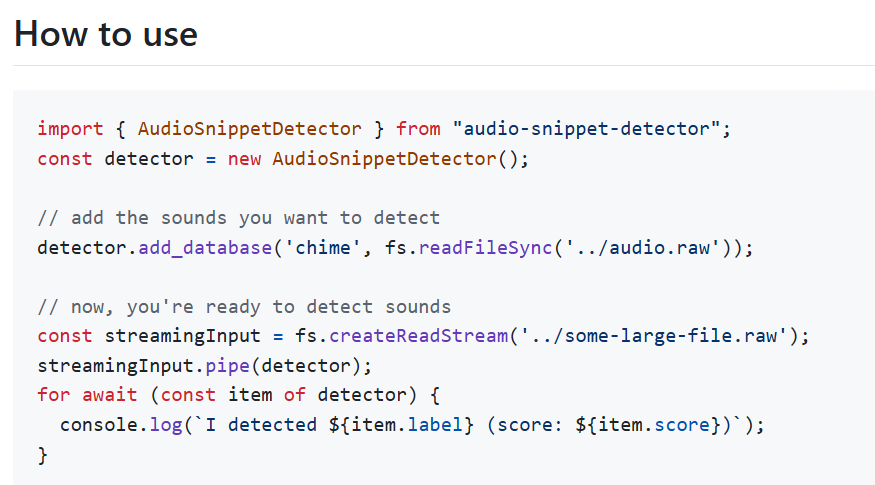
I wanted to make some advanced logic available, easily configurable via a database, in a couple apps that I've been working on recently. Honestly, I could have just stored the c...
There have been multiple analyses about the recent (2020/11/25) outage of AWS Kinesis and its cascading failure mode, taking a chunk of AWS services with it -- including seeming...

Like you, I've been finding myself working from home more often than not. These days, I probably go to an office once a month. I have a 16 inch MacBook Pro, but using it in clam...

I previously wrote a post about running WordPress on AWS Lambda, but it was before EFS support was announced (EFS is a managed network file system AWS provides). Being able to u...
During the COVID-19 pandemic, schools and daycares have been closed, so my family decided to use this as an opportunity to make some habits to make sure we can get through this...