Yesterday was my last day at Geolonia. I had been working at Geolonia since the beginning of 2021, making it just over 3 years. During my time there, I worked on many interesting projects, but I felt that it was time to make a change.
In these 3 years, a lot has changed. The world has seen the rise of LLM-based AI solutions appear and grow rapidly. There are many questions about its effectiveness and ethics, but it’s too late for that now. It’s time to really think about how AI technologies can be used to advance society.
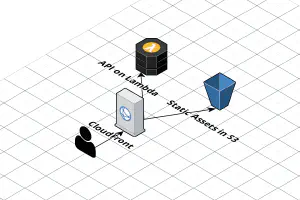
I’ve written about how to host a single page application (SPA) on AWS using CloudFront and S3 before, using the CloudFront “rewrite not found errors as a 200 response with index.html” trick.
Recently, working on a few serverless apps, I’ve realized that this trick, while quick, isn’t perfect. The specific case where it broke down was when the API is configured as a behavior on CloudFront (I usually scope the API to /api on the same domain as the frontend, so CORS and OPTIONS requests aren’t necessary). If the API returned a 404 Not Found response, CloudFront would rewrite it to 200 OK index.html, and the front-end application would get confused. Unfortunately, CloudFront doesn’t support customized error responses per behavior, so the only way to fix this was to use Lambda@Edge instead.
The bots should announce, “I’m not a person, or if I am, I’m not allowed to act like one.”
Or, if there’s no room or time for that sentence, perhaps a simple bot at the top of the conversation. That way, we can save our human emotions for the humans who will appreciate them.
I’ve been working on setting up autoscaling settings for ECS services recently, and here are a couple notes from managing auto-scaling for ECS services using Terraform.
I’m currently working on migrating a Rails application to ECS at work. The current system uses a heavily customized Capistrano setup that’s showing its signs, especially when deploying to more than 10 instances at once.
While patiently waiting for EKS, I decided to use ECS over manage my own Kubernetes cluster on AWS using something like kops. I was initially planning on using Lambda to create the required task definitions and update ECS services, but native CodePipeline deploy support for ECS was announced right before I started planning the project, which greatly simplified the deploy step.
A few years ago when I was doing client work, we would regularly host clients’ sites and apps for them. During this time, I was responsible for both development and keeping them up and running as much as possible. Most of the money being in new development, it was difficult to assign priority to improving the operations of existing applications. In this period, I wanted an “operations person” to teach me how to make new applications that would need minimal operations support from the beginning. Failing this, I decided to become “the operations person” myself.
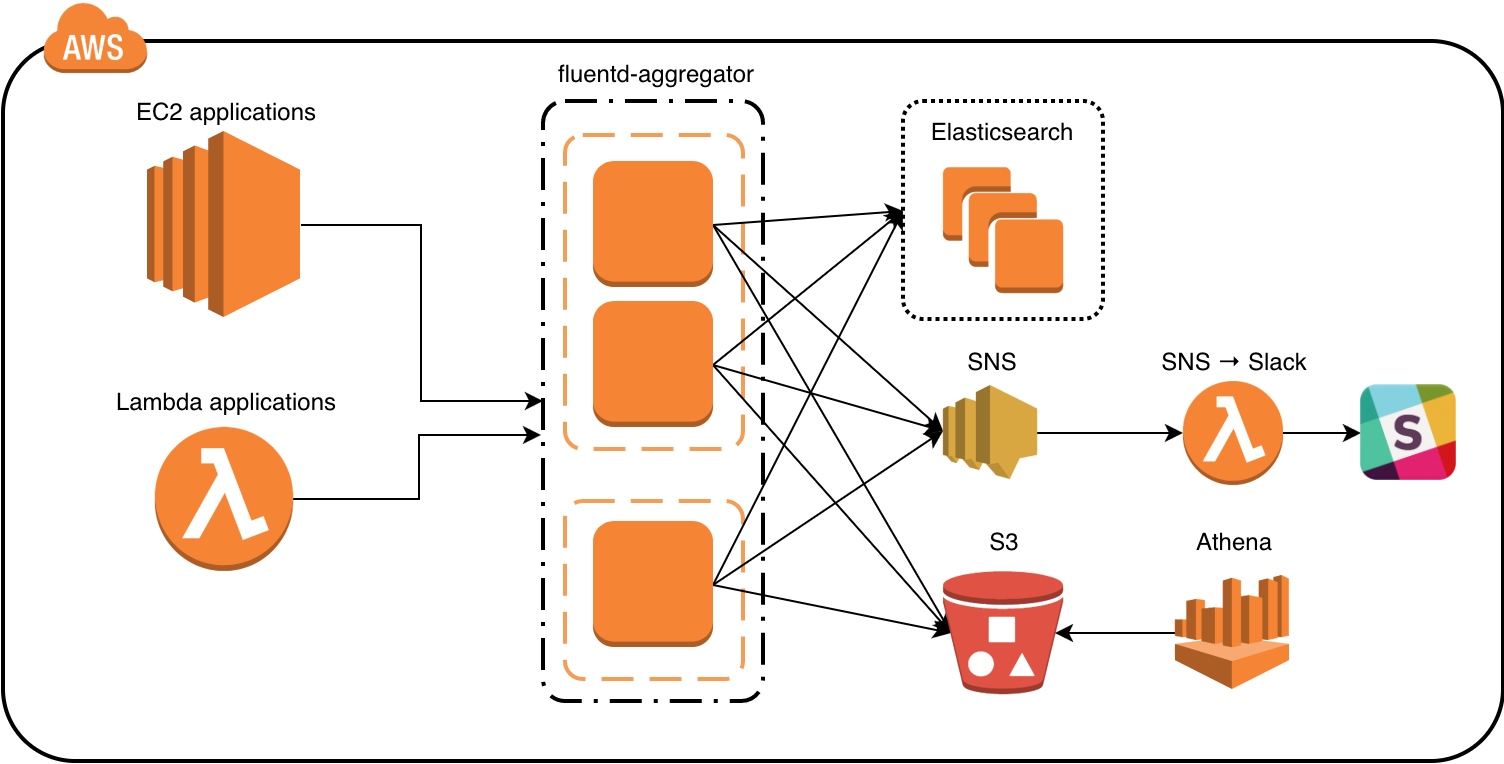
We use fluentd to process and route log events from our various applications. It’s simple, safe, and flexible. With at-least-once delivery by default, log events are buffered at every step before they’re sent off to the various storage backends. However, there are some caveats with using Elasticsearch as a backend.
Currently, our setup looks something like this:
The general flow of data is from the application, to the fluentd aggregators, then to the backends – mainly Elasticsearch and S3. If a log event warrants a notification, it’s published to a SNS topic, which in turn triggers a Lambda function that sends the notification to Slack.
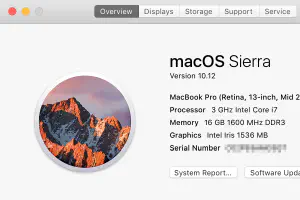
Here are the headline features of Sierra, and my thoughts about them.
Siri
Don’t use it on the phone, won’t use it on the Mac. It would be nice if I could use it by typing, though.
Universal Clipboard
This seems like a massive security risk. It works via iCloud, so if someone (like my daughter) is using my iPad, then it will sync the clipboard to that, too. How do I turn it off?
I stumbled upon Convox a couple weeks ago, and found it pretty interesting. It’s led by a few people formerly from Heroku, and it certainly feels like it. A simple command-line interface to manage your applications on AWS, with almost no AWS-specific configuration required.
An example of how simple it is to deploy a new application:
$ cd ~/my-new-application
$ convox apps create
$ convox apps info
Name my-new-application
Status creating
Release (none)Processes (none)Endpoints
$ convox deploy
Deploying my-new-application
Creating tarball... OK
Uploading... 911 B / 911 B 100.00 % 0RUNNING: tar xz
...
... wait 5-10 minutes for the ELB to be registered ...
$ convox apps info
Name my-new-application
Status running
Release RIIDWNBBXKL
Processes web
Endpoints my-new-application-web-L7URZLD-XXXXXXX.ap-northeast-1.elb.amazonaws.com:80 (web)
Now, you can access your application at that ELB specified in the “Endpoints” section.
Elixir’s Getting Started guides go over the &Module.function/arity and &(...) anonymous function shorthand, but there are a couple neat tricks that are not immediately apparent about this shorthand.