Categories
AWS English WordPress

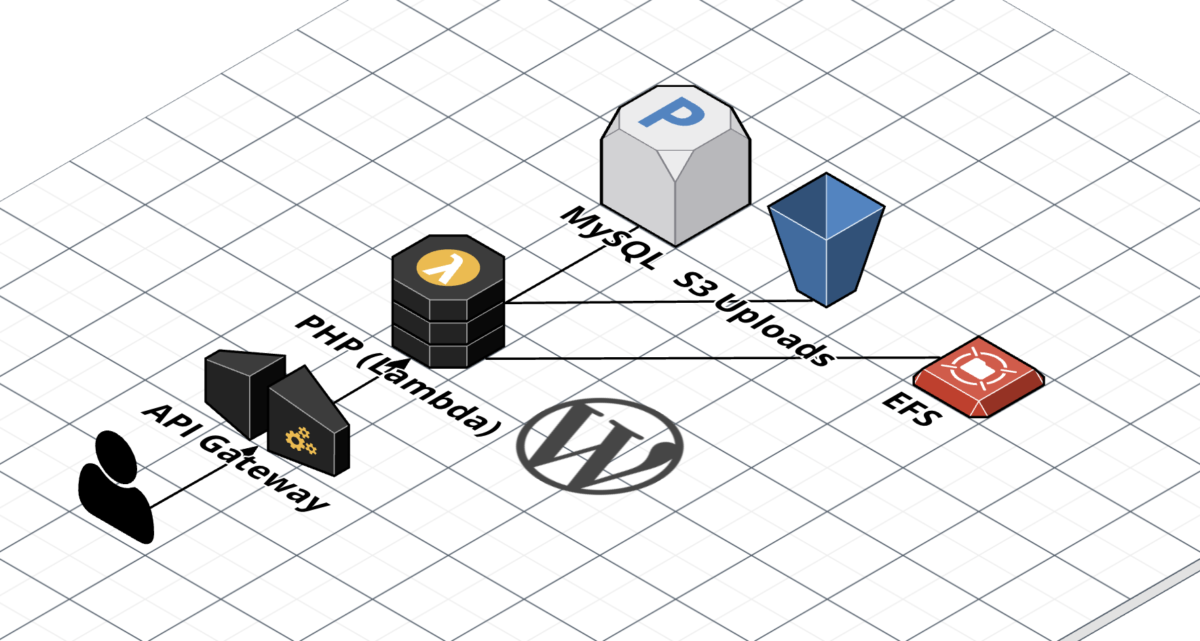
WordPress on AWS Lambda (EFS Edition)

I previously wrote a post about running WordPress on AWS Lambda, but it was before EFS support was announced (EFS is a managed network file system AWS provides). Being able to use EFS completely changes the way WordPress works in Lambda (for the better!), so I felt it warranted a new blog post.

In addition, this time I’m using Terraform instead of SAM. This matches the existing infrastructure-as-code setup I use when I deploy infrastructure for clients. Here’s the Terraform module (source code).

Summary

It works. It’s OK. Check it out, it’s running here. It’s not the best, but it isn’t bad, either. The biggest performance bottleneck is the EFS filesystem, and there’s no getting around that. PHP is serving static assets bundled with WordPress as well, which adds to some latency (in this configuration, CloudFront is caching most of these files, however). Tuning opcache to cache files in memory longer helped a lot.

Because EFS is synchronized across all the instances of Lambda, online updates, installs, and uploads work as expected.

What You’ll Need

In this setup, Lambda is only used for running PHP — installing the initial WordPress files is done on an EC2 instance that has the EFS volume mounted. This is a list of what you’ll need.

  1. An AWS account.
  2. A VPC with Internet access through a NAT gateway or instance (comparison). This is important because EFS connectivity requires Lambda to be set up in a VPC, but it won’t have Internet access by default.
  3. Terraform (the module uses v0.12 syntax, so you’ll need to use v0.12.)
  4. A MySQL database (I’m using MySQL on RDS using the smallest instance available)
  5. An EC2 instance to perform the initial setup and install of WordPress.

For a list of the resources that Terraform will provision, take a look at the Resources page here.

Steps

These steps assume you’re running this Terraform module standalone — if you want to run it in the context of an existing Terraform setup, prepare to adjust accordingly.

If you’re following this step-by-step, be sure to choose the us-west-2 region. Lambda Layer that I’m using for this is only published in the us-west-2 region. I’m working on getting the layer published in other regions, but in the meantime, use my fork of the php-lambda-layer to create your own in the region of your choosing.

1. Start the EC2 instance.

(If it isn’t already running)

I’m using a t3a.nano instance. Install the amazon-efs-utils package to get ready for mounting the EFS volume.

Also, while you’re in the console, note down the ID of a Security Group that allows access to RDS and the IDs of the private subnets to launch Lambda in.

2. Get Terraform up and running.
$ git clone https://github.com/KotobaMedia/terraform-aws-wordpress-on-lambda-efs
$ cd ./terraform-aws-wordpress-on-lambda-efs

Create a file called local.auto.tfvars, and put the following contents in to it:

# An array of the Security Group IDs you listed in step 1.
security_group_ids = ["sg-XXX"]

# An array of the Subnet IDs you listed in step 1.
subnet_ids = ["subnet-XXX", "subnet-XXX", "subnet-XXX"]

If you want to use a custom domain name (instead of the default randomly-generated CloudFront domain name), set the acm_certificate_arn and domain_name variables as well.

Now, you’re ready to create the resources.

$ terraform apply

If you’re asked for your AWS credentials, Ctrl-C and try setting the authentication information via environment variables. I manage a lot of AWS accounts, so I use the AWS_PROFILE environment variable.

Terraform will ask you if you want to go ahead with the apply or not — look over the changes (the initial apply should not have any modifications or deletions), then respond yes.

When the apply has finished, you should see some outputs. If you don’t (or you already closed the window), you can always run terraform output. Keep this window open, you’ll need it in the next step.

3. Mount EFS on the EC2 instance.

First, we need to give the EC2 instance access to the EFS filesystem. Terraform created a security group for us (it’s in the efs_security_group_id output), so attach that to your EC2 instance.

Log in to your EC2 server, then mount the EFS filesystem (replace fs-XXXXX with the value of the efs_file_system_id output):

$ sudo -s
# mkdir /mnt/efs
# mount -t efs fs-XXXXX:/ /mnt/efs

If you’re having trouble mounting the filesystem, double check the security groups and take a look at the User Guide.

4. Install WordPress.

Now that the filesystem is mounted, we can finally proceed to install WordPress. Terraform automatically created a directory in the EFS filesystem (/mnt/efs/roots/wp-lambda-$RANDOM_STRING), so cd to there first. Download the latest version of WordPress, then extract the files there.

Now, you can go ahead with the famous five-minute install like you would with any other WordPress site! If you didn’t set a custom domain name, your site should be accessible at the domain name outputted at cloudfront_distribution_domain_name. If you did set a custom domain, then set a CNAME or alias to the CloudFront distribution domain name, then you should be able to access the site there.

Where to go from here

Here are some ideas for performance improvements that I haven’t tried, but should have some potential.

  • Upload files to S3 instead of WordPress. I use this plugin by Human Made: humanmade/S3-Uploads.
  • Experiment with adjusting the opcache settings in src/php.ini.
  • Use a lightweight nginx server to serve static assets from EFS to CloudFront.
  • Experiment with setting Cache-Control headers in handler.php for static files.

Limitations

There are a couple hard limits imposed by AWS due to the technical limitations of the infrastructure.

Here are some other limitations that you’ll have to keep in mind.

  • No FTP / SSH access — you’ll need to manage an EC2 instance if you need command line or direct file access.
  • All the considerations of accessing a connection-oriented database from Lambda. You can try using Aurora Serverless if you run in to connection problems. RDS Proxy may also be able to provide you with a solution.

Thanks!

Thanks for reading! If you have any questions or comments, please don’t hesitate to leave a comment or send me a tweet.
Categories
App.net English WordPress

App.Net Comments Widget on WordPress

I noticed that most of the good discussion I was having about blog posts were on App.net. Turns out, many other people feel the same way, and there’s even an official App.net comments widget!

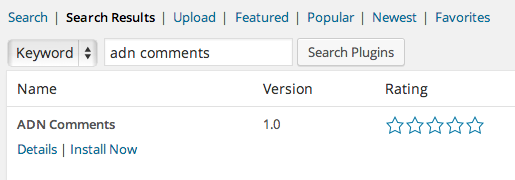
I’ve been testing a WordPress plugin to replace the default WordPress comments with ADN comments on this site for quite a while, so I decided to publish it in the WordPress Plugin Directory. Just search for “ADN Comments”, and it should be the first result.

ADN Comments

Installing this plugin will completely replace WordPress comments. You won’t even be able to see them from the admin dashboard — the data is still there, but just hidden. If you don’t like ADN Comments, just disable the plugin and all your old comments will reappear.

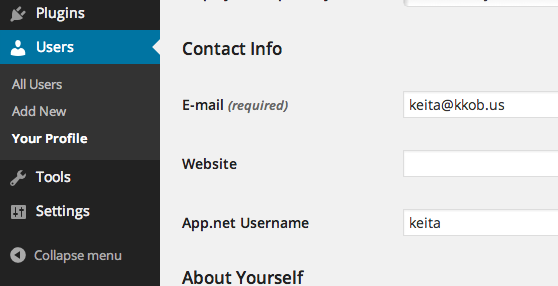
If you’d like to display your username as the default “reply-to” username, please set your App.net username in the “Contact Info” section of your profile.

WordPress Admin => Users => Your Profile => Contact Info => App.net Username

Source code is available under the GPLv2 (or later) license. Code contributions, bug reports, etc, are welcome at the GitHub repository.

Categories
English Nginx Optimization & Speed PHP WordPress

WordPress Meetup Tokyo — WordPress Server Optimization

I recently gave a quick talk about how I use Nginx, HHVM, MariaDB with WordPress on this blog at the March WordPress Meetup in Tokyo. Here are the slides:

I’ve published a Vagrant template for the setup detailed in the slides.

Categories
English PHP WordPress

HHVM and WordPress

Update 2014/4/17: This site now runs WordPress 3.9, which seems to be working fine with HHVM. Also, compatibility has improved, thanks to a patch in the WordPress core specifically for HHVM.

I recently posted about how I switched out PHP-FPM (PHP’s FastCGI pool) for HHVM. Today I’ll be talking more about the install process on the server, and using it to set up WordPress.

What is HHVM?

This is usually what happens in a (successful) startup[footnote]Twitter is (in)famous for its use of Ruby on Rails, which eventually had to be re-written in Scala, a language that runs on the JVM.[/footnote]:

  1. Initial codebase is written in an interpreted language, trading agility and developer productivity for slower response speeds and increased CPU usage on the servers.
  2. The service sees new users coming in and the initial codebase becomes strained.
  3. The service scales up the number of servers, but hits a wall.
  4. The codebase is re-written, either wholly or partially, in to a more performant and efficient language.

Facebook did steps 1 to 3, but refused to do step 4. Compiled languages, while having strengths in performance and efficiency, are usually harder to program in than interpreted languages. So, Facebook made something called HipHop for PHP. HipHop for PHP, or HPHPc for short, compiles PHP into C++, then compiles that into a big binary file. This allows PHP developers to do what they do best — develop in PHP, without worrying (too much) about performance.

As Facebook grew even more, HPHPc began to show its limitations[footnote]Compile time, compiled binary size, lack of MARKDOWN_HASH0f953f8e8cc058300e5041e6f079ab63MARKDOWN_HASH and MARKDOWN_HASH346e614b0b5901e8cdf0ca89b1b3950cMARKDOWN_HASH support, to name a few.[/footnote].

Out of this, came HHVM. HHVM is short for HipHop Virtual Machine, and uses a Just-in-Time (JIT) compiler to run PHP code. The main benefit developers do not need compile the whole binary every time they want deploy new code. With HHVM, Facebook has also worked towards full PHP 5.5[footnote]Wow HHVM is fast…too bad it doesn’t run my code[/footnote] support, support of create_function() and eval(), enabling the majority of PHP application frameworks to work with HHVM.

This includes…

WordPress

WordPress is written in PHP, and runs very well on HHVM. Previously, getting WordPress to work on HHVM required some patches to the core code[footnote]Getting WordPress running on HHVM « HipHop Virtual Machine[/footnote], but these issues have been resolved.

I’ve been running this blog on HHVM for about a week now, and response time is consistently 10x faster than before — 100x if using something like Batcache.

Installation

This server is running CentOS 6.3. While there are packages with HHVM pre-compiled, these packages are not officially supported by Facebook, and are usually compiled by individuals. Your mileage may vary, but package conflicts prevented me from installing any pre-compiled HHVM packages — so I had to compile it myself.

If you plan on running a server with HHVM from scratch, I highly recommend using Ubuntu, and the official precompiled packages for Ubuntu 13.10 / 12.04.

Bugs / Things to watch out for

Because HHVM is not PHP, you may occasionally run into unexpected behavior. Here are some problems I had while setting this site up:

  • No MySQLi support — this means tools like phpMyAdmin and database backup plugins that rely on MySQLi won’t work. Edit: HHVM 3.0 and above have MySQLi built in.
  • In the WordPress “General Settings” area, setting “Timezone” to something like “Asia/Tokyo” caused WordPress to crash. The “UTC +/- (hour)” settings seem to work fine.

That’s all, for now. When I run into more problems, I’ll make sure I post about them (with a workaround, if available).

Categories
English WordPress

wp_enqueue your scripts and styles.

The ease of making a WordPress theme is both a blessing and a curse. It allows people to get started with programming relatively easy — most hosting providers have PHP / MySQL, and the majority have a WordPress quick-install. However, this easiness comes with a dangerous pitfall — it’s easy to do the wrong thing. The classic example of this is query_posts (hint: never use it).

Today, I’ll talk about wp_enqueue_script and wp_enqueue_style. If you have ever made a plugin that requires additional stylesheets or scripts in the front-end, you know exactly what this is (and why it’s important).

The easy way out in this situation is to manually write scripts and styles in header.php like this:

...
<script src="<?php echo get_template_directory_uri(); ?>/hello.js"></script>
...
<?php wp_head(); ?>
...

Although this will work, you may start to notice funny things happening when you want to use jQuery.

...
<script src="<?php echo get_template_directory_uri(); ?>/hello.js"></script>
<script src="<?php echo get_template_directory_uri(); ?>/my_jquery.js"></script>
...
<?php wp_head(); ?>
...

The problem here is that WordPress actually uses jQuery internally for the admin bar. And, it doesn’t know that you’ve packaged your own version of jQuery — so it actually loads twice, when the admin bar is showing. This can cause problems that are time-consuming to fix, and just a waste of time.

WordPress has a mechanism to deal with this, wp_enqueue_script and wp_enqueue_style. These functions will determine the order of scripts and styles based on dependencies, and will only output the styles / scripts that are needed. This kills a few birds with one stone: loading everything in the correct order, making sure nothing is loaded twice, and not wasting bytes on scripts or styles that won’t be used by the current page.

Enough talk! Let’s get into the code.

First, you’ll need a functions.php, with the following code.

/**
 * Enqueue theme scripts and styles
 */
add_action( 'wp_enqueue_scripts', 'THEME_NAME_register_scripts' );
function THEME_NAME_register_scripts () {
  // wp_register_script( script identifier, absolute URI, array of dependencies, version )
  wp_register_script('home', get_template_directory_uri() . '/js/home.js', array('jquery'), filemtime(dirname(__FILE__) . '/js/home.js'));

  if (is_home()) {
    wp_enqueue_script('home');
  }
}

In this example, there is a JavaScript file called “home.js” in the “js” directory. This file requires jQuery, so it will be loaded after jQuery has finished loading. At the bottom of the function, the is_home() conditional is used to load the script only when the home page is showing.

Instead of using conditional tags in the wp_enqueue_scripts action, you can also register your scripts in the enqueue action, then enqueue them in the actual template file. Add the following to the template file, before get_header();:

add_action('wp_enqueue_scripts', function() { wp_enqueue_script('home'); }, 15);

This will load the ‘home’ script that we set up in the earlier snippet.

Have fun! I would be interested to hear feedback — any cool uses of wp_enqueue, et cetera.

Documentation

The syntax of wp_enqueue_style and wp_register_style is similar to the script counterparts, and they go in the same wp_enqueue_scripts action.

Documentation for wp_enqueue_style

Documentation for wp_register_script, including the scripts that WordPress has pre-packaged for you!

Documentation for wp_enqueue_script

Categories
English Uncategorized WordPress

Turbolinks and WordPress

Rails Turbolinks is pretty cool, right? I thought it would be pretty cool to use it on WordPress, too.

There are probably a lot of bugs, and it probably doesn’t work well with JavaScript-heavy sites. I’ve included the jQuery compatibility layer, but it’s still not perfect. Use at your own risk.

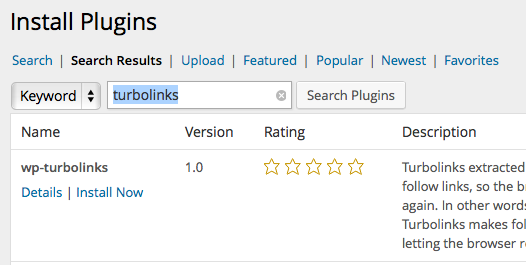
To install, just search the WordPress plugin repository for “turbolinks”

wp-turbolinks

Or, available for download here:

http://wordpress.org/plugins/wp-turbolinks/

Contributors welcome!!!

Categories
English WordPress

WordPress 3.7: Automatic Updates

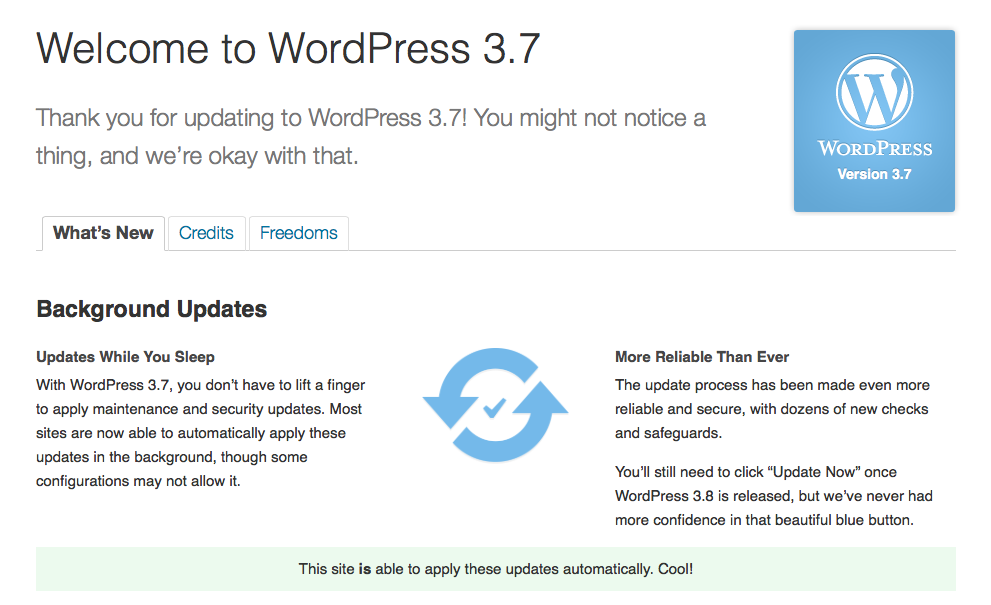
WordPress 3.7 Update Screen

WordPress 3.7 was just released.

Although there are quite a few features in this release, I want to talk about what I feel is the most important feature: automatic updates.

It’s a fairly simple – when a new version of WordPress is released, your installation will be updated (almost) immediately. As of 3.7, these automatic updates are limited to minor maintenance releases to make sure they won’t break your theme or plugin.

As WordPress has become more and more popular, exploits against WordPress have grown not just in quantity but also in complexity. As the threats have increased, so have the defenses — automatic security updates is just another step in the right direction. The last thing I want is for your blog / site to be compromised.

So, I strongly recommend updating to 3.7 as soon as existing themes and plugins have been verified to work with it (you’re using a staging environment… right?).

Happy updating!

Categories
Automate your Workflow English Uncategorized WordPress

Vagrant, WordPress, and Theme Development

I’ve been playing around with Vagrant recently. It really is a great tool for setting up development environments quickly and cleanly – no more local MySQL databases with 100 separate databases!

There are a few ways to solve this problem that many WordPress developers have:

  1. Use WordPress Multisite mode.
  2. Regularly clean your databases up and delete old ones.
  3. Use a common WordPress install, switching themes.
  4. Use Vagrant.

I’m going to be talking about the last option, Vagrant, in this blog post. I’ll list out a few reasons why Vagrant was attractive to me in the first place:

  • Isolation – this was appealing not only to reduce my database clutter, but also to be sure that the development and production environments were as similar as possible (within reason – of course).
  • Portability – another killer feature of Vagrant. Check out the repository, vagrant up, and you’re ready to go.
  • Coolness – don’t you love the idea of having contained, automatically managed environments for your projects? No? Well, I do.

Here’s what I came up with: vagrant-wp-theme-template.

It’s a template based on Underscores (_s), a template theme for WordPress themes. I’ve made two modifications: convert the CSS to SCSS, and the JavaScript to CoffeeScript. Grunt, an excellent automation tool, is used to compile the sources into CSS and JavaScript.

I’ve made the template compatible with _s, so just follow the instructions for _s regarding naming your theme, then the directions for getting your development environment set up. If you want to use an existing theme, just drop it inside the theme folder (and don’t forget to update the name in the Vagrantfile!)

I’m always open to new ideas and pull requests – please don’t hesitate to contribute!

Finally, this wouldn’t have been possible without the help of @miya0001‘s vagrant-chef-centos-wordpress, which this template is built off of. Thanks!

Categories
English Meta

Moved!

Just writing to let you know that I’ve switched servers for this blog! I’ve been meaning to get this on to a faster server that I have control over for awhile, and I finally got around to doing it.

For those of you who are curious, this site is being served by WordPress Multisite, on a Sakura 2G VPS.

And because everyone likes talking about stacks:

Stack.

Kidding.

That’s it! There is some moderate caching in most layers (WordPress Object Cache, APC, NGINX, etc), but nothing too drastic. It’s much faster now than it was on the previous server – we’ll see how this one holds up.

Thoughts during the Migration Process

MariaDB

I can’t say this enough – really, really, really smooth. Just stop mysql, remove, install MariaDB, then start it up again. All my data was migrated automatically.

NGINX + PHP + WordPress

There were a ton of guides for this kind of setup, but the two that most helped me were the WordPress Codex and rtCamp’s excellent WordPress + Nginx tutorials. Reading through both is highly recommended.

Categories
Automate your Workflow English

WordPress Install Script pt. 2

A week ago, I posted Automate your Workflow: Local WordPress Install with a script that helps you install new WordPress installations. I’ve been using it regularly, and have made some improvements:

  • Multi-language support (install a different language with the -l switch)
  • Nightly build support (-v nightly)
  • Multi-version (-v {code in the 'Version' column})
  • Arbitrary URL support (-u {URL})

As always, the script is available as a gist.